Network
All of the configuration settings for the client/server version of Redactor can be found in the Admin section (http://localhost:9000/admin by default).
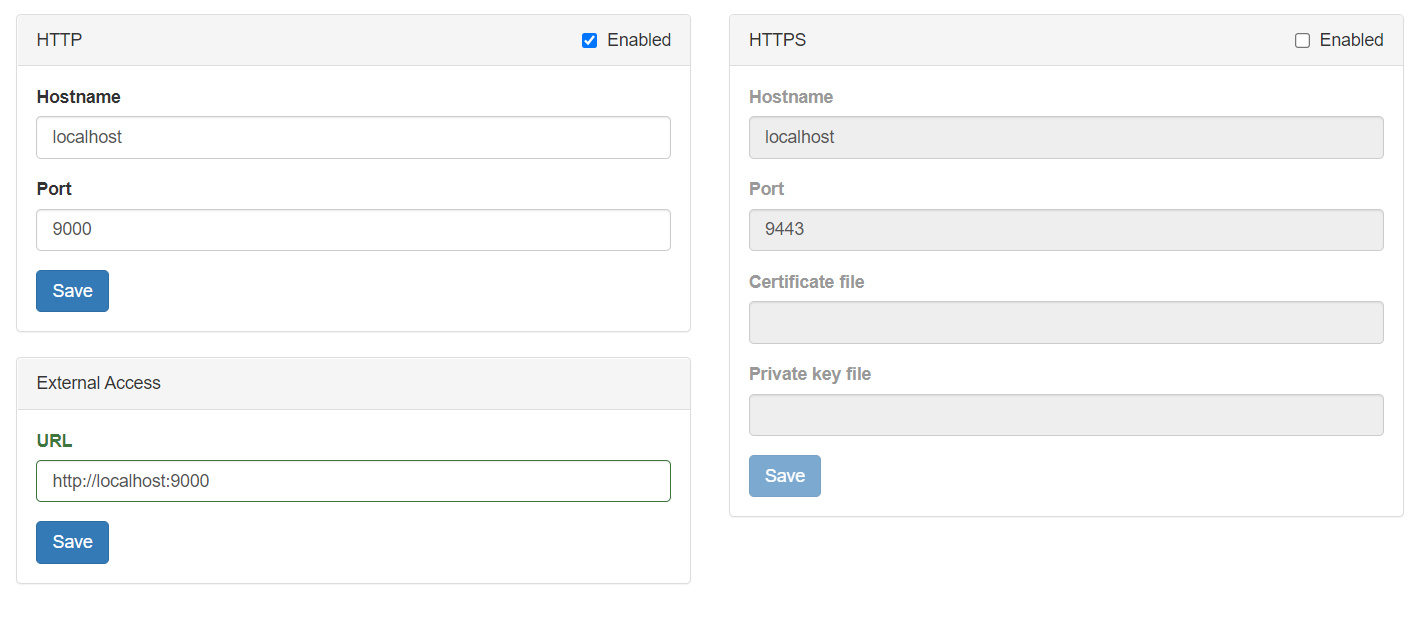
HTTP
The hostname (or IP address) and port the Redactor server is listening on. By default, the server can be reached at http://localhost:9000 or http://<hostname>:9000
HTTPS
To enable HTTPS between the server and clients:
- Check the “Enabled” box at the top of the HTTPS panel.
- If desired, change the hostname and port.
- Enter the fully-qualified paths to the locations of the SSL certificate and key files. (e.g. c:\ssl\cert.crt and c:\ssl\cert.key)
- The private key cannot be encrypted or protected by a passphrase.
- In lieu of configuring Redactor to manage SSL, a webserver (IIS, nginx, etc.) can be used as a reverse proxy. The web server will be set up with the SSL certificate and receive request on port 443 for example. It then forwards those requests to the Redactor server over HTTP on port 9000 (by default). This approach can be quicker if a web server is already installed on the Redactor machine.
Note: It’s recommended to keep the HTTP settings enabled, at least on intial configuration, just in case there’s trouble accessing the HTTPS server after setting it up.
Note: If the user has a PFX file, it can be converted to the correct pair of files by using OpenSSL from the command line by the following:
openssl pkcs12 -in example.pfx -nocerts -out example.key
openssl pkcs12 -in example.pfx -nokeys -out example.crt
External Access
This URL is primarly used to create the address displayed inside of password reset emails. If you allow password resets, please ensure that this URL is accessible for your users.