Projects
The Projects page is displayed whenever you open the application. It shows all previously loaded media and allows you to upload new ones. If a media file is undergoing redaction, its thumbnail will display a progress bar to show its status. To open a file in the redaction editor, click its thumbnail on the Projects screen.
Add Media
To upload a new media file, click the "Add media" button or drag and drop a file (or multiple) onto the Projects page.
Note
If you experience a failure after uploading a video, it may contain an unsupported codec or container. You can use a 3rd party application to convert the file into a supported format. Sighthound Redactor currently only supports video and image files. Audio files (e.g. my-audio-file.mp3) cannot be loaded into Redactor. Please see the list of supported video containers, codecs, and image file formats below:
Video Containers and Codecs
Containers: MP4, TS, AVI, MKV, MOV, and MPG
Video: h264, mpeg-4, VP8, VP9, mpeg1video, mpeg2video, msvideo1
Audio: AAC, MP1, MP2, MP3, PCM
Image Files
Formats: apng, bmp, gif, jp2, jpeg, jpg, png
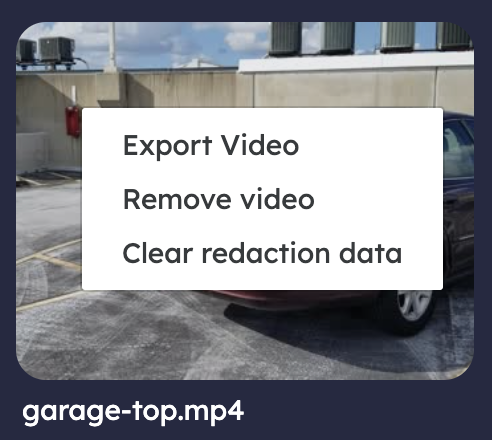
Remove Video & Clear Redactions
If a file has previously been redacted, the redaction data will automatically load when the media is opened. The redaction data for a file can be reset by right clicking the thumbnail on the Projects screen and selecting “Clear redaction data”.
If you want to remove a media file from your projects list, right click on the thumbnail, and select “Remove video” or "Remove image".
Toolbar
At the top right the toolbar has a settings cog next to the processing queue icon. It contains the application version number, a dark mode toggle, multi-language selection, a way to contact support, and a link to our documentation.
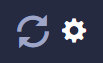
At the top right the toolbar contains buttons to return to the admin page (if the user has an admin or supervisor role) and log out. Just below that there is a settings cog. It contains the application version number, a dark mode toggle, multi-language selection, a way to contact support, and a link to our documentation.

Multi-select
Multi-select lets you select multiple media files at once. You can then bulk auto detect and render & export. Also if you pick from a video's context menu it will be applied all of the selected videos, useful e.g. to remove media in bulk.
Auto Detect
When you click the Multi-select button, you will see these button options at the top right:

These buttons will appear greyed out until you select at least one video or image.
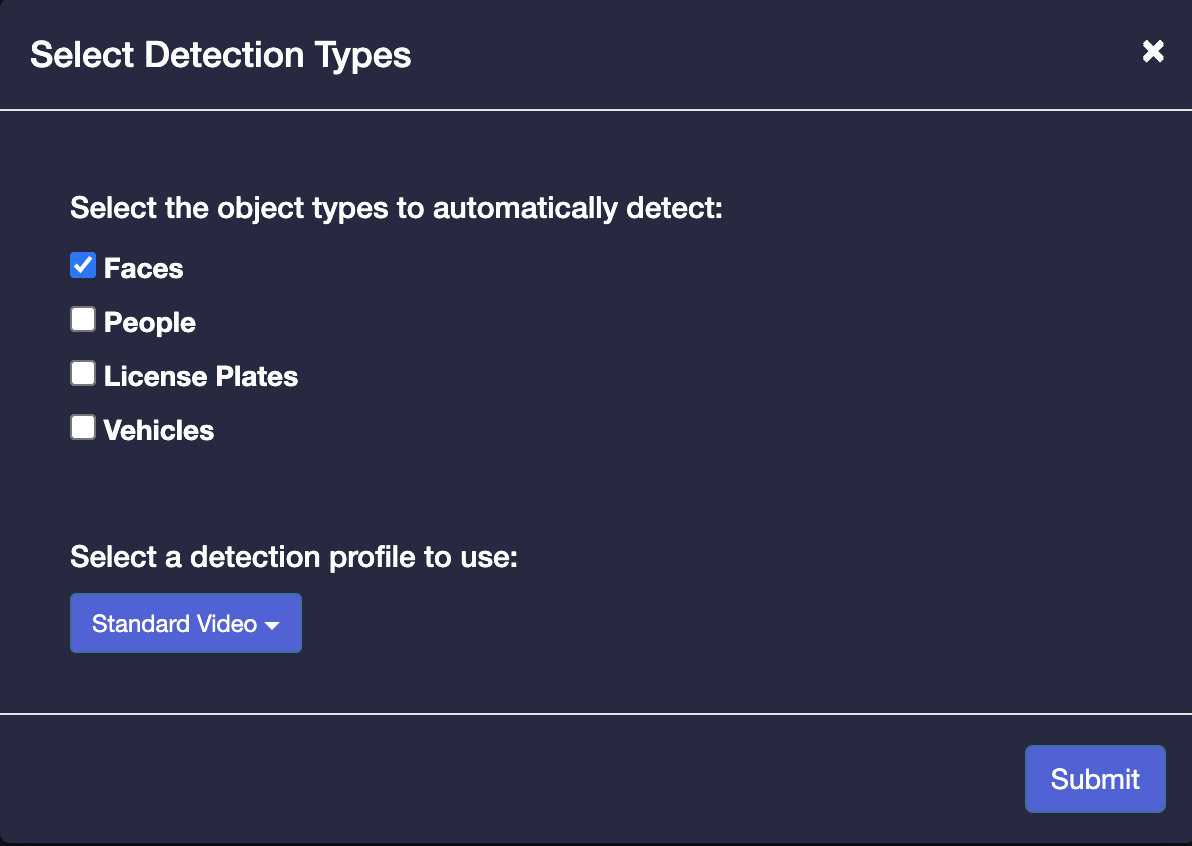
Once you select the media files you want to redact, click the "Auto Detect" button to bring up the "Detection Types" modal. You can choose the object types that will automatically be detected in your videos or images and select a Detection Confidence based on your video type to get more accurate results.
Render & Export
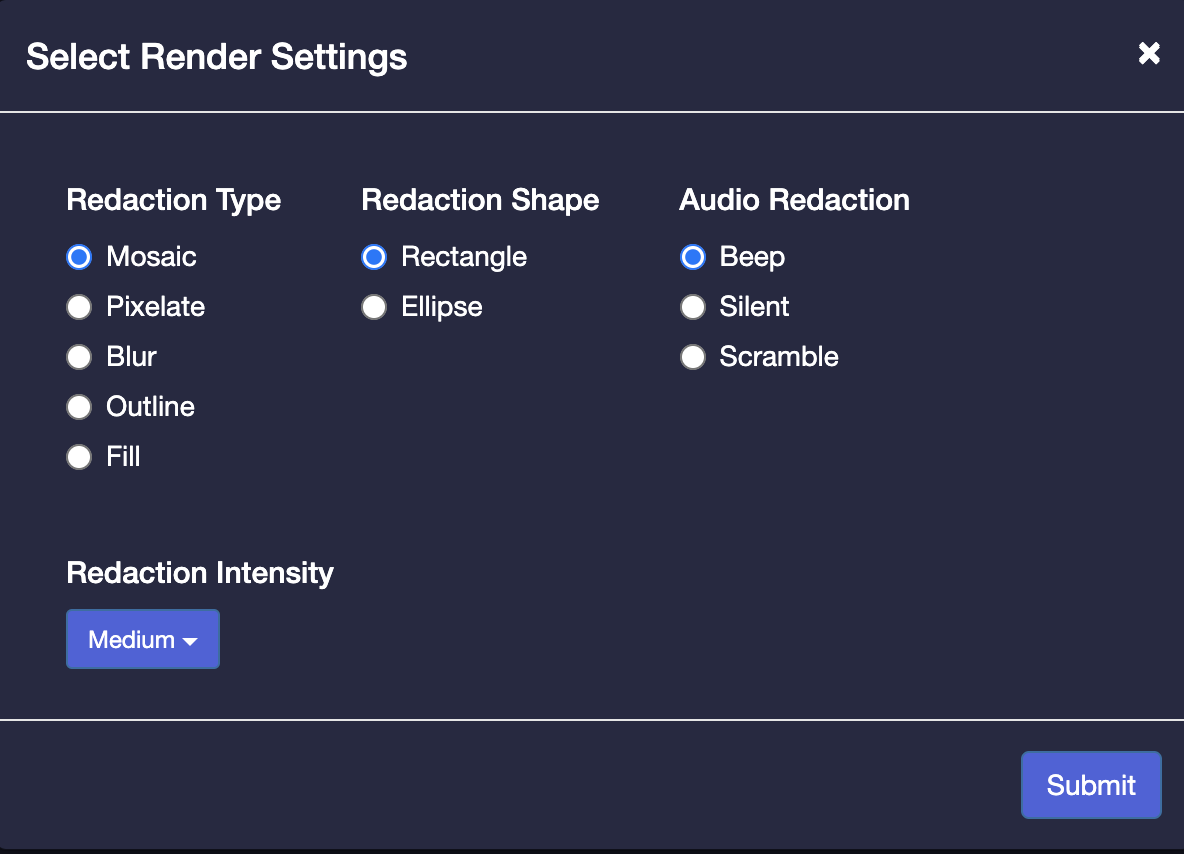
When your videos or images are finished redacting, re-select the media files, and click the "Render & Export" button to bring up the render settings modal. Select the render settings you want and click "Submit". The files that you selected will now have progress bars under them and will disappear once they are finished processing. They will be automatically exported into the designated location picked in the render settings.

Note: Audio Redaction will only be applied if you've done an audio redaction on the video, if not the default audio will still play
Auto Detect
When you click the Multi-select button you will see these button options at the top right:

These buttons will appear greyed out until you select a media file.
Once you finish selecting the videos or images that you want to redact, click the "Auto Detect" button to bring up the "Detection Types" modal. There you can select the object types that will automatically be detected in your videos or images. You can also select a Detection Confidence based on your video type to get more accurate results.
Render
When your media files are finished redacting, re-select the videos, images or audio, and click the "Render" button to bring up the render settings modal. Select the render settings you want and click "Submit". The files that you selected will now process.
Export
When processing is finished an export two icons will appear under the media files that have been rendered. You can choose to export or preview the rendered media.